Ethernet Switch Setup For OnPing Polling On Local Network
- Remove components from the shipping box, locate the USB stick, and plug it into the PC.
- On the USB stick, locate the file “Connection Diagram” and open it. Follow the diagram to make all necessary connections.
- Verify Ethernet Port 1 on the Ethernet Switch is connected to the cell modem or the internet access point. Port 2 should be connected to Lumberjack. Apply power to components. If using a cell modem, allow 5 minutes for the cell modem to establish a connection to the service provider. Refer to the cell modem manufacturer's documents to learn status light definitions.
- Set your Personal Computer Local Ethernet Port to “Obtain an IP address automatically” in your Network Connections.
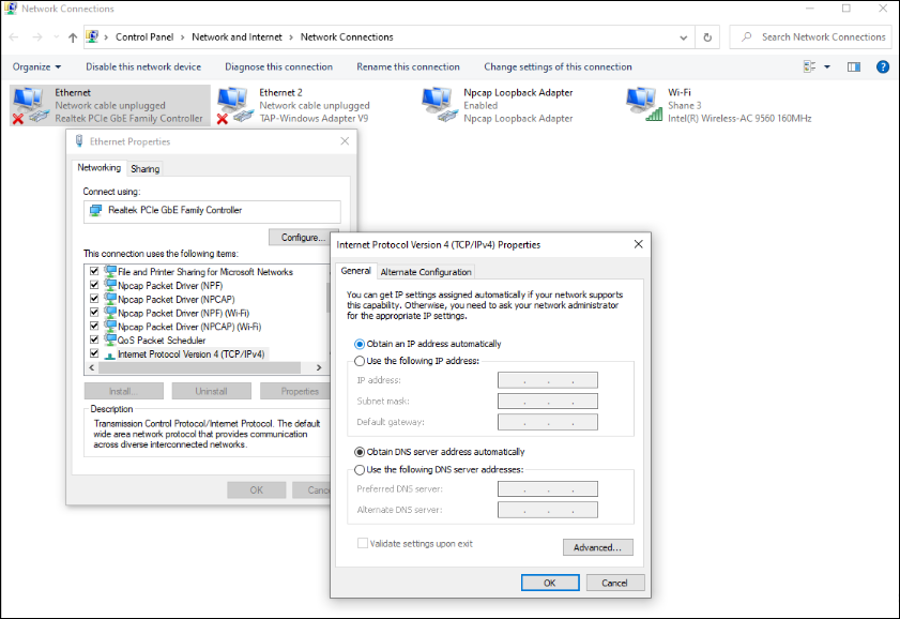
- Connect the Ethernet cable from the Personal Computer’s Ethernet port to the switch’s Ethernet Port 3. You should now have an Internet connection.
- On the USB stick, find and copy the file “ changeSwitchNetwork.rsc ” and paste it to your Desktop on the PC.
- Go to the Desktop and right-click on the file, open the file with Notepad ++ or your preferred editor. Once open, edit the IP address under the #######CHANGE THIS######### text. This IP should be on the same network as the Device IP that the Lumberjack will poll.
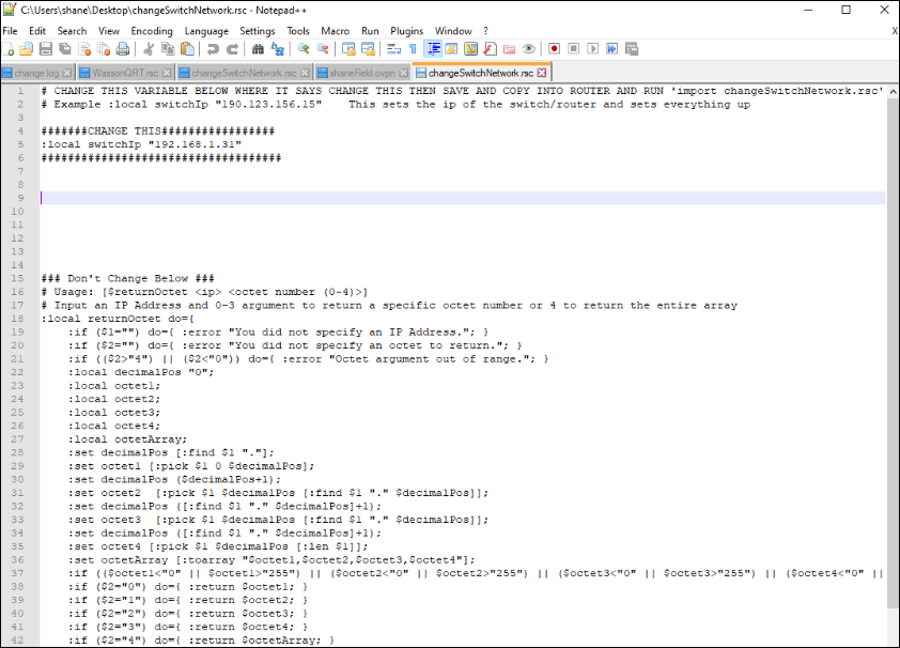
- Once the correct IP has been entered, save the file and close. Now, on your personal computer, open the WinBox software. If you don’t have WinBox, you can download it from https://mikrotik.com/download. Download the correct version for your PC.
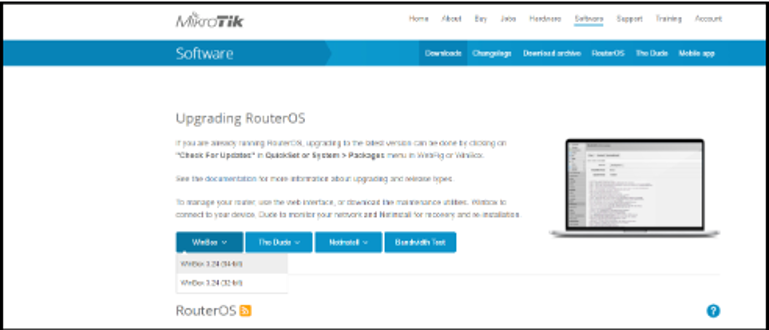
- Open WinBox
 and click on the “Neighbors” tab, click to highlight the MAC Address, and click “Connect.” This is the provided Ethernet switch that is being connected.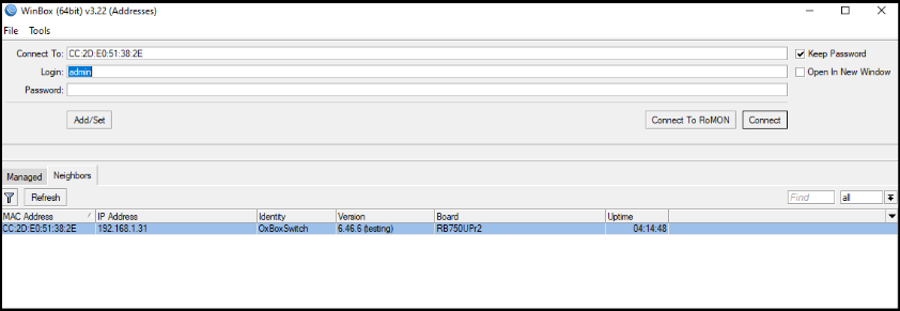
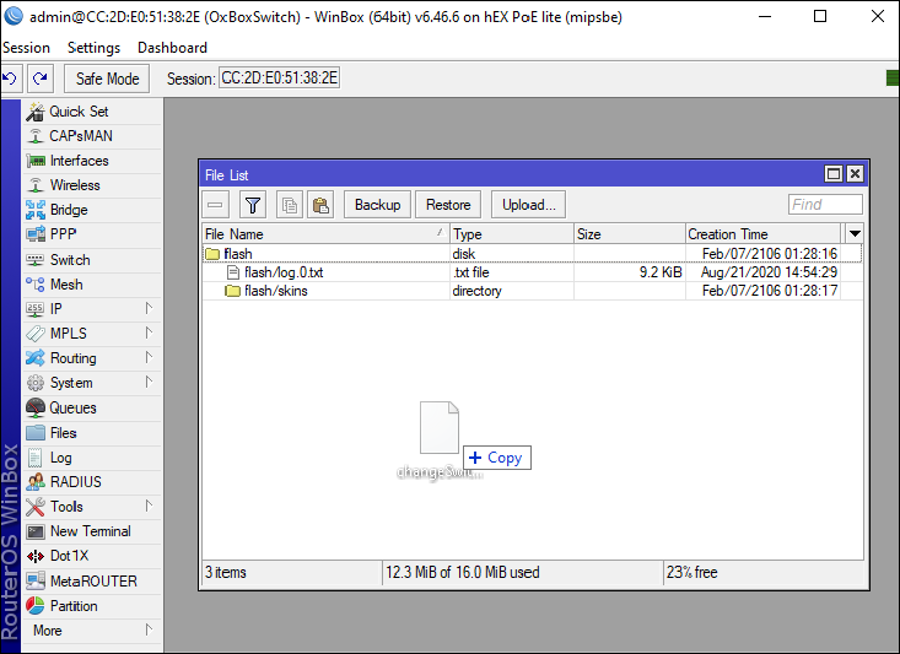
- 0nce connected, click “Files” on the left side, near the middle of the window. Once open, locate the file “changeSwitchNetwork.rsc” on your Desktop and drag or copy and paste it into the blank area of the File List window.
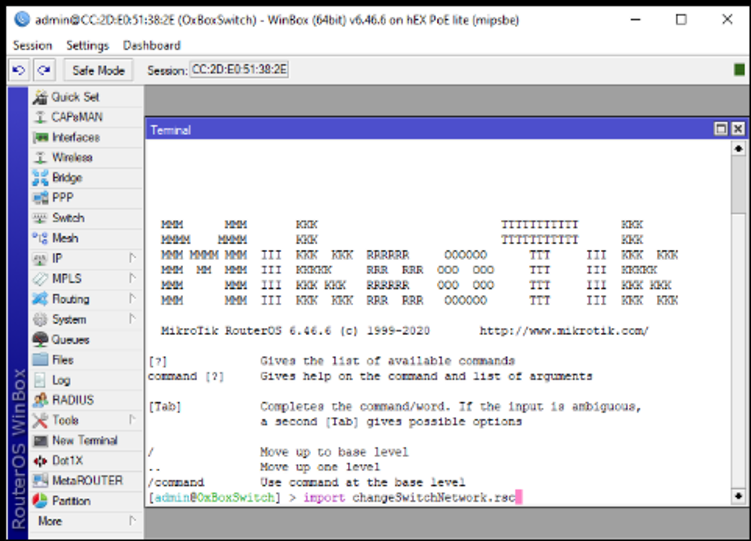
- Once the file is copied into the File List window, click on “New Terminal”, on the left, near the bottom. When open at the bottom, notice the cursor point, type "import changeSwitchNetwork.rsc", and hit the Enter key on PC. When the import is complete, it will prompt you to reboot; type Y to reset.
- Allow a minute for the reboot, then click “Reconnect.” Once connected, close any open windows in WinBox.
- If using the Ethernet switch as a DHCP Server (Default Setting), then refer to step 14; else, go to step 15. (Example: If your device is set up with DHCP enabled, then the Ethernet switch will assign an IP address to your device each time it is connected to the switch.)
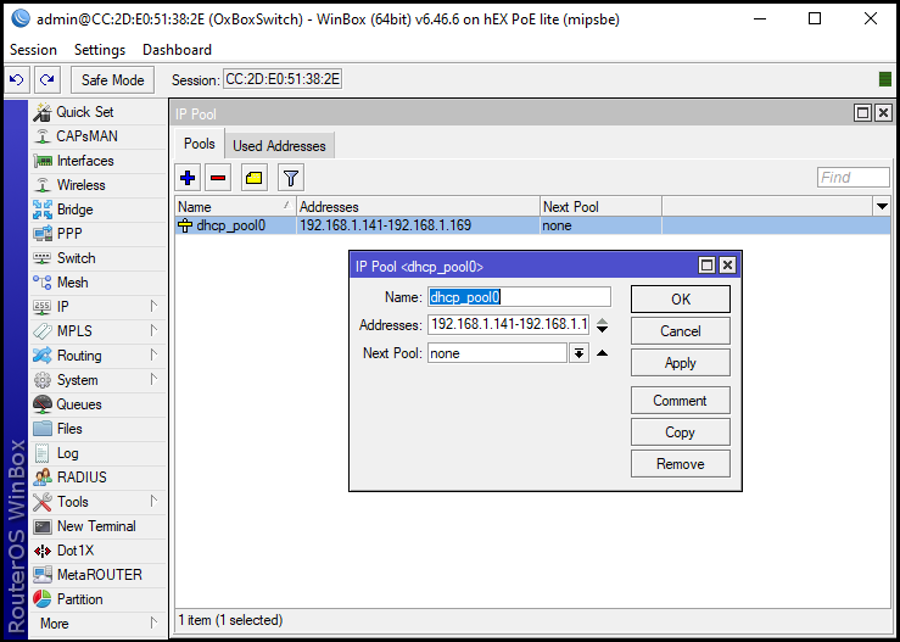
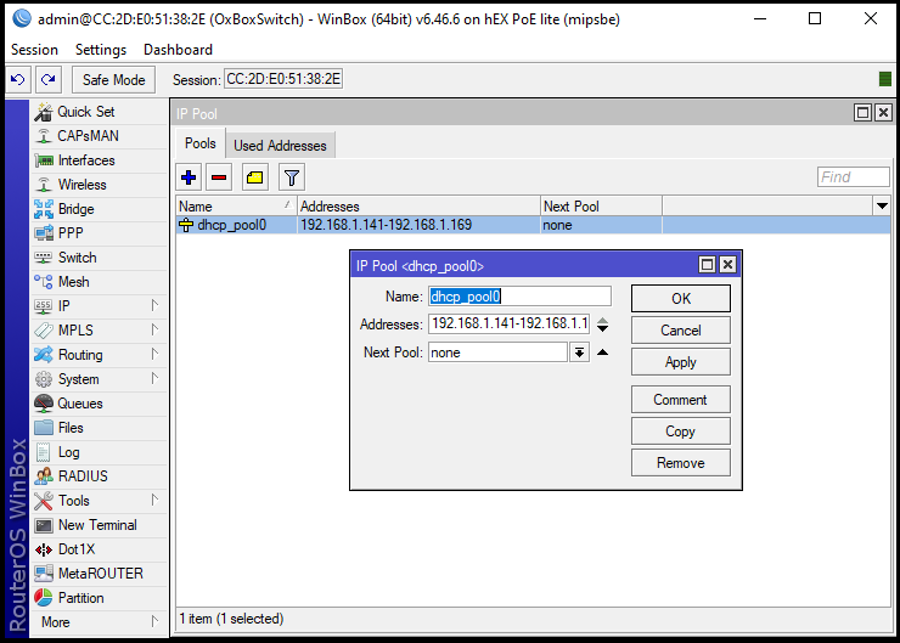
- Click on “IP” in the center of WinBox, go down, and select “Pool”. This is the DHCP IP assignment pool. If any of your network IPs fall within this range, you must adjust them to meet your network needs. Double-click the addresses to open the edit window, make changes to IPs, and click “Apply” then “OK”. Now click “System” then “Reboot”.
- If you want to disable the DHCP on the Ethernet switch, click on “IP” then “DHCP Server”. Highlight dhcp1 by clicking it, then click the “Red X” radio button to disable it. The DHCP Server is now disabled.
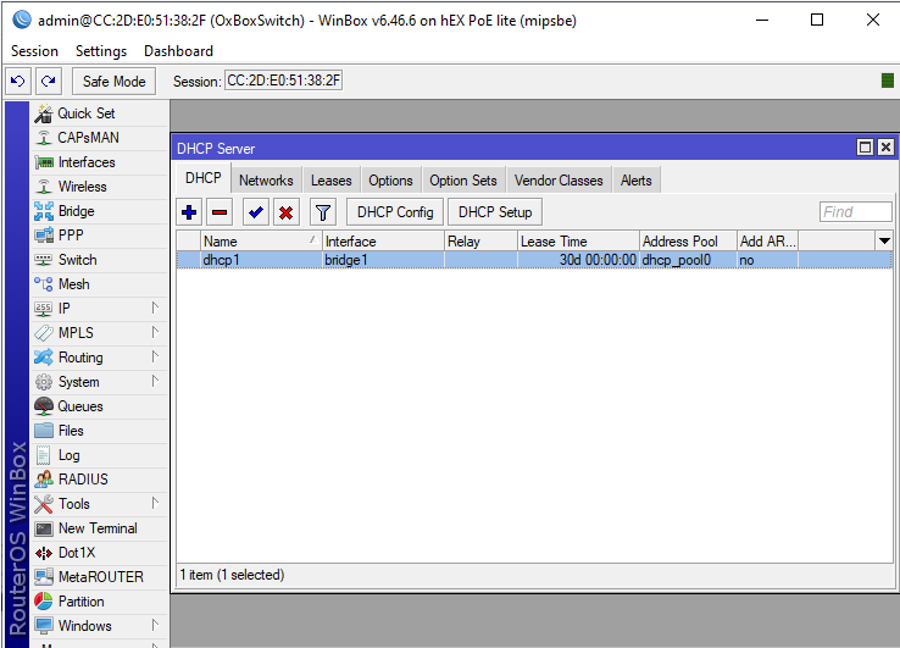 Note: If the DHCP Server is disabled, the Local Area Network on your PC and the LumberJack will need an assigned Local Network IP as explained in a later chapter.
 - Connect the Ethernet cable from the available port on the Ethernet switch to the device to be polled by Onping.
Note: If the polling device uses serial, steps 16, 17, 18, and 20 are not needed. - If rebooted, then click Reconnect, click “New Terminal,” and at the cursor type Ping XXX.XXX.XXX.XXX the IP of the Device you are polling and hit “Enter” on your PC.
To stop the pinging command, press CTRL+C on the PC Keyboard.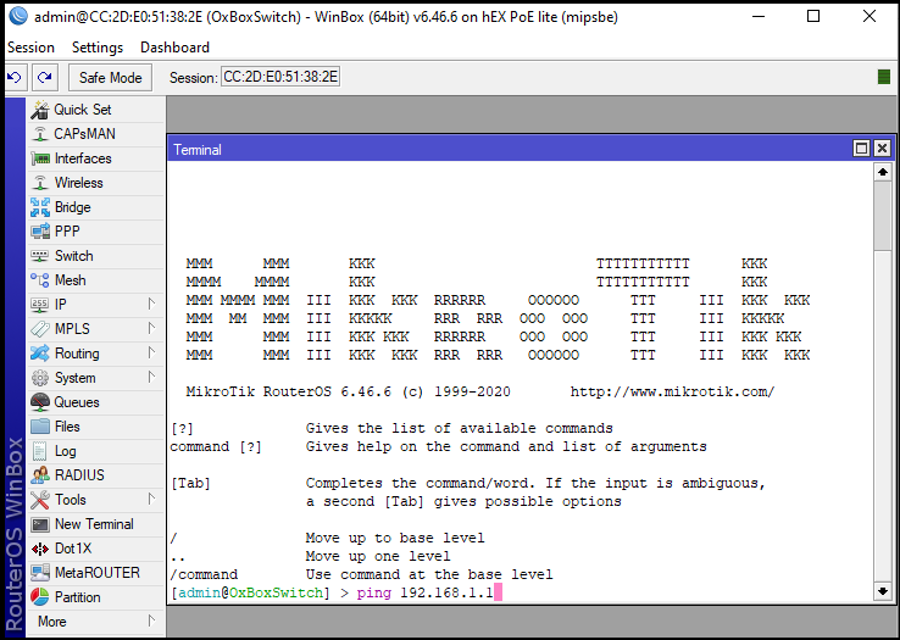
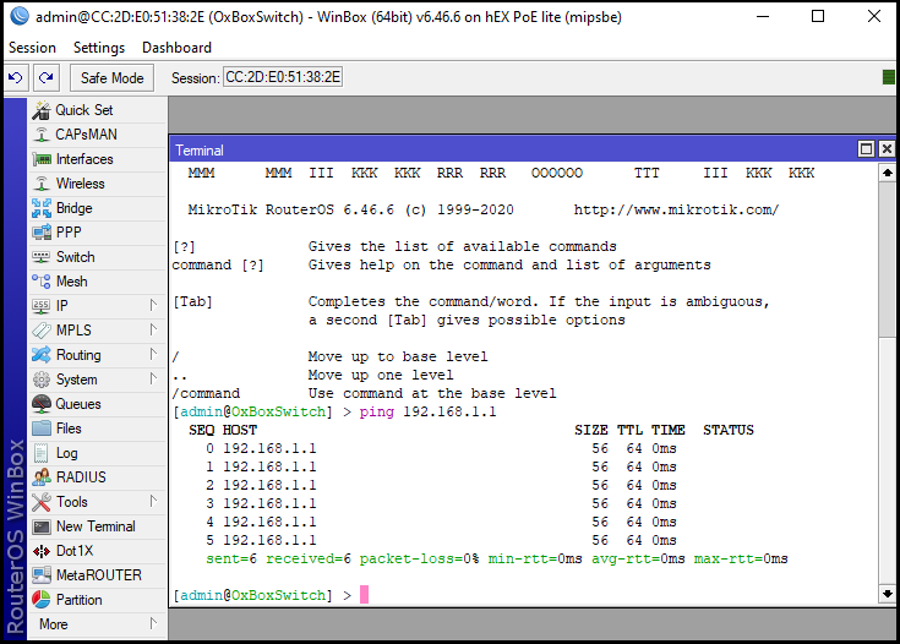
- If communications are good, you should see replies like the example below.
- Now from “New Terminal” at cursor type Ping www.Google.com to check for Internet connection. To stop the pinging command press CNTRL+C on PC Keyboard. Once this is complete click the X on the Terminal window to close.
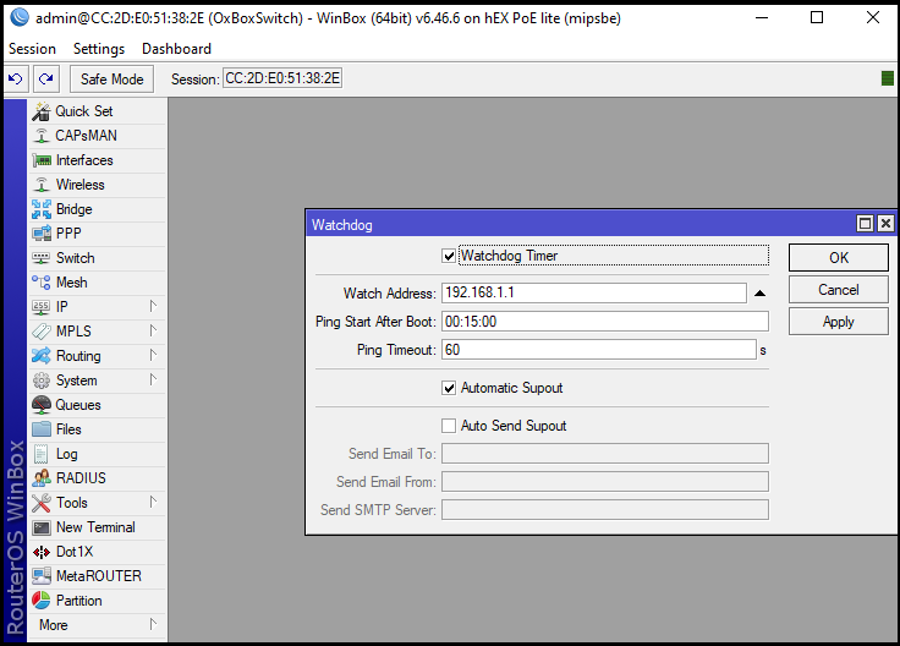
- Now click “System” then “Watchdog”, This opens the watchdog timer window. Verify the Watchdog Timer box is checked. In the Watch Address entry, type the IP of the device you are polling from Onping. The Ping Start After Boot should not be set less than 15 minutes. Once complete click “Apply then “OK”.
- Close WinBox setup is complete.
- Allow a minute for the reboot, then click “Reconnect.” Once connected, close any open windows in WinBox.
- If using the Ethernet switch as a DHCP Server (Default Setting), then refer to step 14; else, go to step 15. (Example: If your device is set up with DHCP enabled, then the Ethernet switch will assign an IP address to your device each time it is connected to the switch.)
- Click on “IP” on the left center of WinBox, go down and select “Pool”. This is the DHCP IP assignment pool. If any of your network IPs fall within this range, you must adjust it to meet your network needs. Double-click the addresses to open the edit window, make changes to IPs, and click “Apply” then “OK”. Now click “System” then “Reboot”.
- If you want to disable the DHCP on the Ethernet switch, click on “IP” then “DHCP Server”. Highlight dhcp1 by clicking it, then click the “Red X” radio button to disable it. The DHCP Server is now disabled.
Note: If the DHCP Server is disabled, the Local Area Network on your PC and the LumberJack will need an assigned Local Network IP as explained in a later chapter.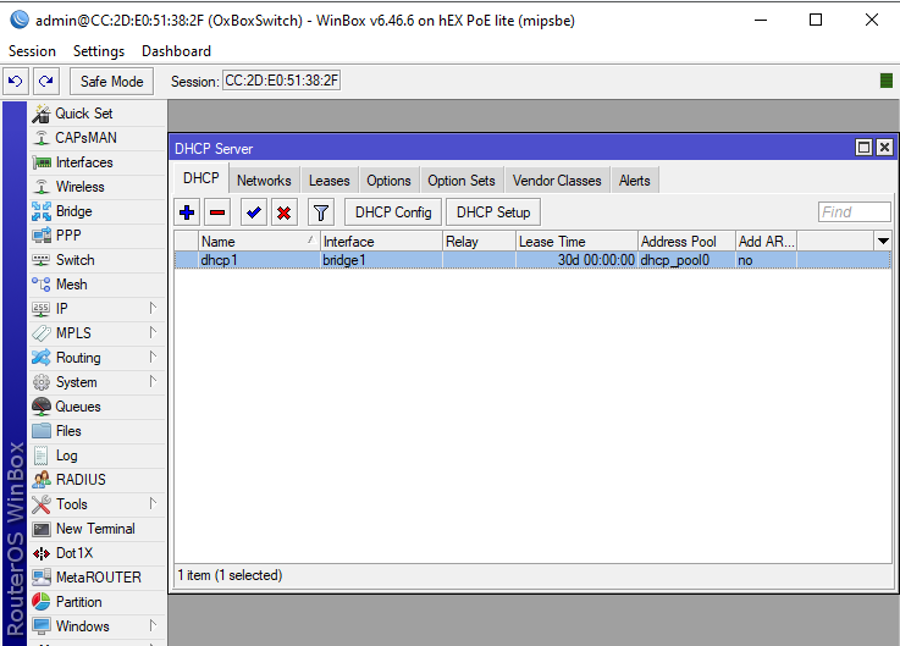
- Connect an Ethernet cable from an available port on the Ethernet switch to the device to be polled by Onping.
Note: If the polling device uses serial, steps 16, 17, 18, and 20 are not needed. - If rebooted, click Reconnect, then click “New Terminal.” At the prompt, type Ping XXX.XXX.XXX.XXX (the IP of the device you are polling) and hit “Enter” on your PC..
To stop the pinging command, press CTRL+C on the PC Keyboard.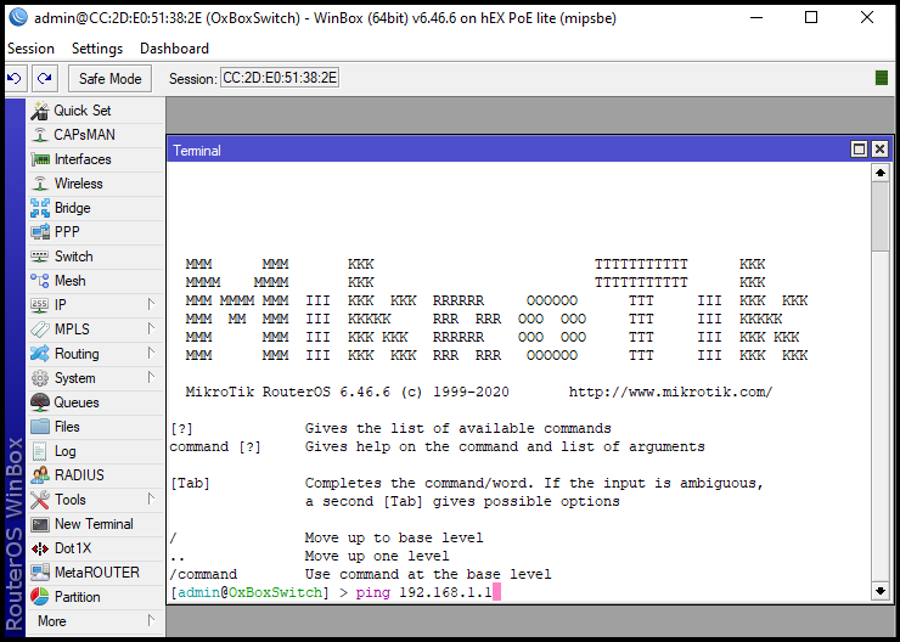
- If communications are good you should see replies like example below.
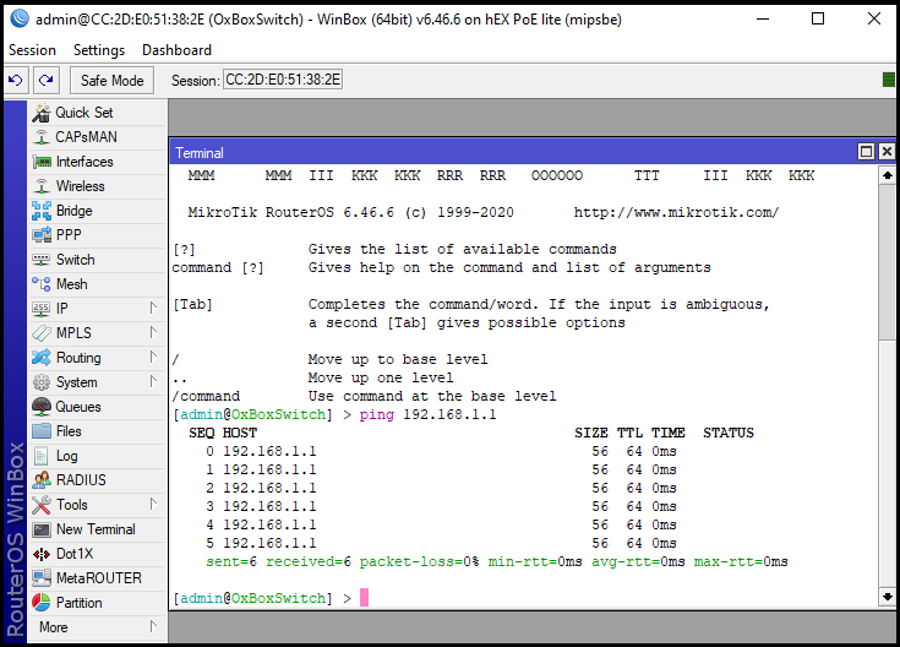
- Now, from “New Terminal” at the cursor type Ping www.Google.com to check for Internet connection. To stop the pinging command, press CTRL+C on the PC Keyboard. Once this is complete, click the X on the Terminal window to close.
- Now click “System” then “Watchdog”. This opens the watchdog timer window. Verify the Watchdog Timer box is checked. In the Watch Address entry, type the IP of the device you are polling from Onping. The Ping Start After Boot should not be set to less than 15 minutes. Once complete, click “Apply then “OK”.
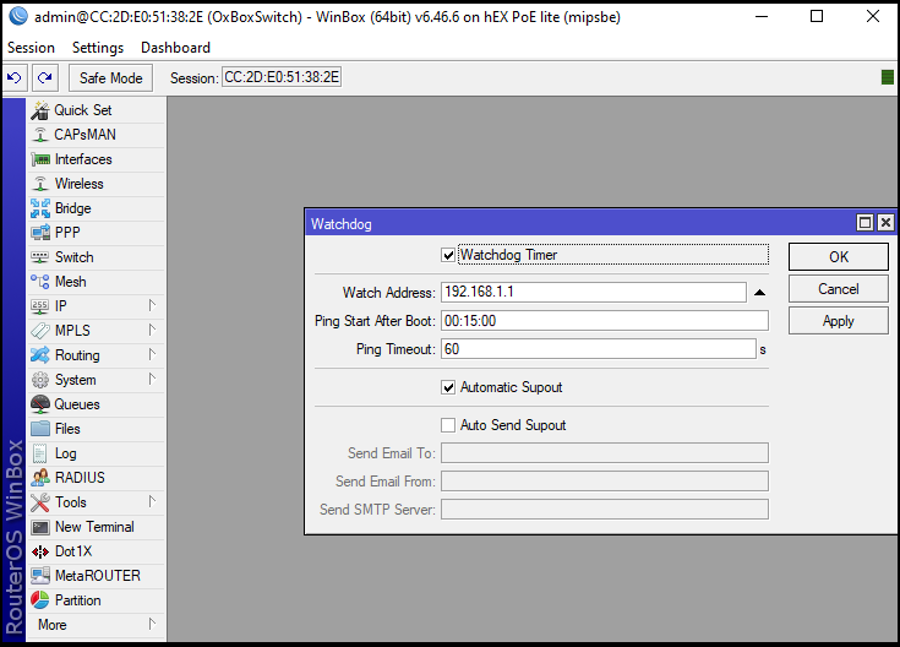
- Close WinBox setup is complete.
Was this article helpful?
That’s Great!
Thank you for your feedback
Sorry! We couldn't be helpful
Thank you for your feedback
Feedback sent
We appreciate your effort and will try to fix the article